Well, we are certainly learning from our mistakes this year. After the deer ravaged the green beans I coated them in cayenne pepper, but was certain that they were ruined and left them alone for a week or so. I came back to find that not only had the pepper worked, but I was overrun by green beans almost overnight. Some had grown too big to use. I will dry them for beans to plant next year or use in bean and ham soup. I did can quite a bit (seven quarts, I think). So, I picked and picked and then picked and picked a couple days later. For some reason I thought they were done. I'm not sure why. I didn't bother to weed, I just left them alone and assumed we'd till that area up sooner or later. Tonight I was out by the green beans and looked again to find them covered in more blossoms, trying to grow more green beans for me. So, I have a HUGE weeding job to do now. The grass has come up between them and gone to seed and grown fox tails. I feel sort of guilty for this but at least I'll know next time. The only good thing about the weeds being so big is that they're almost easier to pull than when they're tiny. I just grab a hold and pull huge masses out at a time. Hopefully my hard work tonight and early tomorrow morning will pay off in several more quarts of home-canned green beans.
Now, on to the cayenne pepper - it DOES work. It works VERY well. We have been quite pleased. While I never was brave enough to "drop trou" and try urinating on the garden as some suggested (LOL, as if I would even consider doing that), Bryan did find a product at the farm and home supply store called "Deer Fortress." It was on clearance so he bought it. It's so gross I almost don't want to blog about it but I will. It comes in a package with six gray cylinder-shaped canisters and these little metal spikes to hang them on around your garden. Inside of the canisters is dried hog blood. Apparently the smell frightens the deer. If I could smell it, I'm sure it'd work on me, too. Yuck. Anyway, the deer have stayed away.
Another important note about weeding: Some of our watermelon have rotted underneath. We thought they were doing great but we've had an onslaught of rain this spring and summer with tons of hard rainstorms. We haven't had to water our garden once. Not once! And it's now August! But, with all that rain, any produce that was touching the ground and not getting a chance to dry out well during the day got rotten. We lost a lot of bell peppers this way even though they were weeded, they just got too wet. So, another lesson learned. We are going to be SUCH good gardeners next year! :)
I have been canning tomatoes and even peaches. The peaches were juicy and I canned them in their own juices like you would tomatoes. It's been a very rewarding experience to put up my canned produce in my pantry and think about the wintry days ahead when I'll pull them out to prepare meals for our family.
Thursday, August 5, 2010
Wednesday, July 28, 2010
Treasures

Last year my dad told me that he had found several boxes of canning jars that belonged to my Great Granny Hare. I was so excited to pack them up and bring them home with me. This summer we finally got to see them. They were dirty and dusty and packed in old boxes but they were absolutely perfect. We brought them home and set them in the garage until it was time to start canning. This past weekend I got them out.

I love the colors, shapes, sizes and names of these jars. I wondered why some of them had the blue color. It's mesmerizing to me. I have some of them up in my kitchen window right now just to gaze at. As I began canning I realized that when you place green food inside of these blue-tinted jars it gives it a rich and appealing color, as compared to the clear glass. I love the names; Presto Supreme Mason, Ball Perfect Mason, Knox Mason and, my personal favorite - Atlas Strong Shoulder Mason.

Holidays 1977: Me at age 6 months with Great Grandad and Granny Hare during the holidays. My mother says they absolutely loved me.
 I don't know if I can put into words how special it was to me to get to have these jars and to use them. I know they're just jars but, to me, they are treasures. I don't even feel that they are mine, but that they are hers and I'm being allowed to use them. I believe that our ancestors watch us and take joy in seeing our interests, especially when they mirror their own. I went to the garage this Saturday morning and began opening the dusty boxes and pulling out various jars to wash and can with. It felt almost sacred to take them out of their resting places and revive them. I wondered if she was the last person to can with them and pondered what she put in them. I held one up to my nose and closed my eyes to take a deep breath, curious to see if I might be able to catch just a trace of what had been there. There was no smell but I was delighted to find a brittle old sticker on one that read, "Apples."
 I enjoyed the rest of my day canning. I canned jam, green beans and dill pickles. I used a pressure canner for the first time ever. It's safe to say I'm hooked. I love this new hobby and I love that I've learned a skill that my great-grandmother had. I especially love these little treasured jars.
Monday, July 26, 2010
Just Peachy!

I have a friend locally who has a large orchard. She grows all kinds of stuff, but mostly apples. She also has peaches. I asked her to let me know if she had any "peach seconds." Seconds would be produce that had something a little wrong with it but was still usable. They may have bad spots or, in her case, a spot where one of her ducks has taken a bite. They're great for canning and freezing because it doesn't matter if they don't look perfect - you just cut off the bad parts and go on. I love that it keeps the fruit from getting wasted. How can you stand to waste delicious summer fruit?!

Well, I heard from her late last week and she sold me 20 pounds of peach seconds for $6. Yep - 20 pounds of peaches for only $6. That's easier than growing them myself! Ask around your area for an orchard or pick-your-own place. You never know what type of deals you might find.
As you can see, most of my peaches were pretty good. Some were pretty mushy or moldy, especially by the third day I worked on them, but I was able to use all of them.

I was able to peel, slice and freeze 4 quarts and put them in a deep freeze. To freeze them you will first need to peel them. You can either do this by blanching them (immersing them in boiling water for about 30 or 40 seconds and then transferring them to an ice bath causing the skin to come off easily) or just using a top grade fruit and vegetable peeler. Cut off your bad spots and cut the flesh completely away from the pit - remember not to waste! Line them out on a cookie sheet (I had wax paper on mine but don't think it was necessary) so that they will freeze individually. Place the cookie sheet in the freezer for an hour or two, then remove and put them promptly into freezer bags and put them in the deep freeze. This way, you can pull out just a handful of peach slices if you want to drop them in your oatmeal or have them for a snack without defrosting the whole bag at once.
 I also had some leftover strawberries in the freezer and I made a strawberry-peach jam. It's heavenly. I think it'd be great as a dessert jam, maybe on homemade biscuits after dinner or as a filling for a layer cake. We also ate lots of fresh peaches this weekend and today I used the last of them for a peach cobbler. I'm planning on asking for more. It's just such a great price and I was able to keep them in the fridge and work on them little by little over the weekend. I may make a frozen peach pie filling so during the winter I can just whip up a crust and pour it in and be ready to go. I love that we'll be enjoying the fruits of our labors long into the winter.
 Tuesday, July 20, 2010
My Dear Little Deer,

I've noticed how you took the time to sample absolutely everything in my garden. You've eaten tomato plants, green beans, baby watermelon, pie pumpkins, and even bell pepper leaves. I'm certain that the majority of these items don't even appeal to you. While I've always considered you a graceful and beautiful animal and have admired you as you run around the neighboring woods, I now realize that you are an arrogant and snooty animal and think you can just ravage and waste what is not rightfully yours! I see you decided to try an unripened pie pumpkin rind and then spit it out all over the ground. Not your taste? Please stop ravaging my garden!!!
Sincerely,
The Gardener
ps - I'll be seeing you this fall with my first ever deer tag and a big fat grin on my face.
So, you see we are learning with the garden. The deer weren't a problem until all of a sudden. And then, within a day or two, the entire garden had been ravaged. I had a beautiful crop of green beans coming in and I was so looking forward to canning them. Not only did they eat them, they trampled them and I think I even found a spot where a deer laid down and took a nap in them. The tomatoes are mostly fine as they have the cages around them, so the deer are merely pruning the tops for me, making the plant more bushy and hardy. I had a baby watermelon plant that looks similar to the pie pumpkin.
The pie pumpkin was heartbreaking for me. Where we live, there was a pie pumpkin shortage last fall and I was unable to buy pie pumpkin all winter. I've heard it's easy to can and was so looking forward to growing my own and enjoying pumpkin bread and pumpkin walnut pancakes and pumpkin and black bean soup. I basically had a tantrum when I found that pumpkin. We were given two pieces of advice from everyone who heard our troubles. #1: Let my boys pee all around the garden. #2: Cover the leaves of everything with cayenne pepper. We have neighbors and they're trying to sell their house so I went with the second option.

You can see how the top of the bell pepper plant in the photo above has been nibbled away. It's been two days now since I peppered the garden and they've left it alone. I picked a sad amount of beans. I think it may be too late for them - the deer really worked them over quickly - but I'm determined to save our corn.
Also, I have many new watermelons coming in and some more little pie pumpkins. Notice how spicy they are. I think it won't affect the flavor as they have a naturally dense rind and it's not near the roots.

Still, as frustrating as this was, it was a learning experience. It'll make us better gardeners next year. I'm not sure if we'll be putting in an electric fence or not but we have some time to think about it. We'll definitely have to do something differently. Hopefully we can fend them off for the rest of the season with the pepper. Fingers crossed...
Saturday, July 17, 2010
Lillie's Gorgeous Garden
Ok gardeners, are you ready for some inspiration? Well, here it is...

This garden belongs to my sister-in-law and her husband. They have been avid gardeners since they got married so they've been through several years of trial and error and they know what they like and what works. I felt they had some handy tips and ideas to share.
First off, you'll notice the electric fence they've installed this year. They live in the country and the deer will eat your garden before you have a chance to enjoy it. (Sadly, we've learned this this year). The fence is also low to the ground to keep out rabbits and other small animals, as well as the larger ones. They purchased the pieces for this and installed it themselves. It's worked beautifully.
Lillie commented that when they were first married and had less property, they began experimenting with adding in crops that were also ornamental so they could fit right into the landscaping without taking up lots of space. I remember they had lots of fruit trees and grape vines. She was always canning something delicious. (My friend Jolin also does an amazing job of fitting crops into the landscape. Sadly, I forgot my camera on my visit to her Kansas City garden).
Lillie has used their cabbage to make sauerkraut.

 She describes this method as being "straight from the Depression Era." You shred your fresh cabbage and stuff it down into a sterilized jar. You add a teaspoon of salt and begin pouring in hot, sterile water. You let it sit and add more water until it's almost all the way full. Then, you put a lid on it and set it in the sun. Over a couple of weeks as it ferments the salt will prevent the growth of bacteria. When it has finished fermenting and settles back down it will seal the lid and voila - you've got homemade sauerkraut. How about that?
This is the little strawberry patch that they put in this year. There are young peach trees next to it, and this area is enclosed in the electric fence as well. These strawberries have done really well.

Here she is picking zucchini. I took some home and made zucchini bread with it. Yum!

I believe these are the watermelon plants. Behind Lillie you can see an area that has been dug up. They had just harvested their potatoes and did quite well. She is able to get a year's supply of many things from their garden; potatoes, corn, green beans, blackberries, bell peppers, tomatoes, etc. The bell peppers she just chops and freezes. They freeze well. They also do great if you dehydrate them, then you just add them to soups and chili in the winter and they taste just like the fresh peppers.

Now, are you ready for something really freaky? Well, they had a bunch of pumpkin plants come up voluntarily. Apparently, pumpkin can cross-pollinate with watermelon. They now have an odd assortment of pumpkins growing. Some are little and yellow like this:

Some are bumpy with watermelon stripes like this:

Notice here how the pumpkin leaves morph and turn into watermelon leaves. These are pumpkin plants:

And finally, the weirdest part of all? They are thinking that pumpkin can also cross-pollinate with zucchini because look at this pumpkin. Please note the size of that thing - compare it to Lillie's hand. It's a monster zucchini-pumpkin:

This garden belongs to my sister-in-law and her husband. They have been avid gardeners since they got married so they've been through several years of trial and error and they know what they like and what works. I felt they had some handy tips and ideas to share.
First off, you'll notice the electric fence they've installed this year. They live in the country and the deer will eat your garden before you have a chance to enjoy it. (Sadly, we've learned this this year). The fence is also low to the ground to keep out rabbits and other small animals, as well as the larger ones. They purchased the pieces for this and installed it themselves. It's worked beautifully.
 We've always used tomato cages because that's what we have, but I think we'll be trying this next year. These are cattle panels. They come in six foot sections and can be purchased at farm and home supply stores.

As the tomato plants grow up Josh and Lillie push the top of the plant back and forth through the bars, weaving the plant as it grows. They say they've tried lots of methods and they like this the best because it's easy to weed and easy to pick. They also use the cattle panels for their peas and blackberries. 

Lillie commented that when they were first married and had less property, they began experimenting with adding in crops that were also ornamental so they could fit right into the landscaping without taking up lots of space. I remember they had lots of fruit trees and grape vines. She was always canning something delicious. (My friend Jolin also does an amazing job of fitting crops into the landscape. Sadly, I forgot my camera on my visit to her Kansas City garden).
Lillie has used their cabbage to make sauerkraut.
She describes this method as being "straight from the Depression Era." You shred your fresh cabbage and stuff it down into a sterilized jar. You add a teaspoon of salt and begin pouring in hot, sterile water. You let it sit and add more water until it's almost all the way full. Then, you put a lid on it and set it in the sun. Over a couple of weeks as it ferments the salt will prevent the growth of bacteria. When it has finished fermenting and settles back down it will seal the lid and voila - you've got homemade sauerkraut. How about that?You'll also notice the pond in the background there. Josh commented to me once that he would sometimes carry water from the pond to water the garden to avoid watering with treated water that would add chemicals (from the tap).
This is the little strawberry patch that they put in this year. There are young peach trees next to it, and this area is enclosed in the electric fence as well. These strawberries have done really well.
Here she is picking zucchini. I took some home and made zucchini bread with it. Yum!
I believe these are the watermelon plants. Behind Lillie you can see an area that has been dug up. They had just harvested their potatoes and did quite well. She is able to get a year's supply of many things from their garden; potatoes, corn, green beans, blackberries, bell peppers, tomatoes, etc. The bell peppers she just chops and freezes. They freeze well. They also do great if you dehydrate them, then you just add them to soups and chili in the winter and they taste just like the fresh peppers.
Now, are you ready for something really freaky? Well, they had a bunch of pumpkin plants come up voluntarily. Apparently, pumpkin can cross-pollinate with watermelon. They now have an odd assortment of pumpkins growing. Some are little and yellow like this:
Some are bumpy with watermelon stripes like this:
Notice here how the pumpkin leaves morph and turn into watermelon leaves. These are pumpkin plants:
And finally, the weirdest part of all? They are thinking that pumpkin can also cross-pollinate with zucchini because look at this pumpkin. Please note the size of that thing - compare it to Lillie's hand. It's a monster zucchini-pumpkin:

I'm curious to see what they look like inside when they cut them open.
Well, I hope you all got some ideas. I love looking at other's gardens. Everyone has a different way of doing things and there's always something to be learned. Lillie and Josh - thanks for letting me come photograph and share your garden!
Wednesday, July 7, 2010
Canning Pickles
 While my garden is not yet ready to start canning from, my sister-in-law and her husband planted about 6 weeks earlier than we did and she's been sharing. I sent over some homemade bread one day and the next day she sent over a bunch of cucumbers! I didn't even plant cucumbers this year so it was even better. I looked up a recipe for bread and butter pickles and have made about 8 jars (she's sent them twice now as she has more than she can use). This recipe also uses white onions which I bought at the store. We opened some last week and put them on grilled burgers and OH. MY. GOODNESS. they were good! Much better than anything I've ever bought at the store.
I've never canned pickles before but I found it to be simple, yet time consuming. I think that basically sums up canning of all types. It's not really hard, it just takes time, but it's well worth the effort.
And, as for my sister-in-law's garden goes - I'm going to go take photos. It's awe-inspiring. Seriously. She and her husband have been avid gardeners since they got married and they're really good at it. They have lots of ideas to share.
Here is a photo of my canning jars preparing to boil and sanitize before I made the bread and butter pickles.
 When it comes to jars, they can be expensive. When we moved into our home we found boxes and boxes of canning jars thrown out in the shed. They were dirty, but since they are glass, we can wash and sanitize them and they'll be as good as new. All I've had to buy are some new lids and bands and we're good to go. I've also heard of people finding them for pennies at yard sales.
These particular jars (shown), however, are very special. My dad found boxes of canning jars that belonged to my great-grandmother. She used to can in them. I LOVE antiques. Most of these jars only have slight differences to the modern ones, like different designs, but to me they are treasures. I used some of them to can the pickles and I reminisced about what my Great Granny Hare would have canned in them and what it was like in her garden and in her kitchen where she did her canning. Some of the jars are an antique green glass. I can't wait to use them. Maybe for green beans?
An added bonus of making these pickles is that I will soon have a year's supply of pickles in my food storage. That may not sound like much but it's one less thing I have to buy at the store over the next year. I can use them for all sorts of things; garnishes, toppings, tuna salad, potato salad, etc. And, if you're wondering about the onions, they're as crunchy and tasty as the pickles. Divine!
Wednesday, June 23, 2010
Vinegar in the Wash

I've never been a fan of vinegar. I've always detested the smell of it. In fact, I'm certain that the only times I've used it in the past were for certain recipes that required it - like Asian cole slaw. Several of my savvy blog readers, however, have told me about the benefits of using vinegar in the wash and I have to say, I'm becoming quite the fan of the stinky substance!
Here's how it works:
1. Put 1/4 cup of distilled white vinegar into the fabric softener compartment in your washing machine.
2. Run the machine like normal.
3. End up with fabulous results! First off, it acts as a fabric softener. Your clothes will be fluffier and softer. Secondly, it helps prevent your laundry from souring. Now, if you leave it in there a really long time I'm sure it still will but I left a damp load in the dryer for 24 hours on accident (on a warm day) and it was still fresh when I found it. I didn't have to rewash it. Third, if you have trouble with a stinky washer it fixes that, too! A couple of people commented that they have a type of drain on their washer that holds a little water and it was always stinky. They added vinegar as a rinse-aid and voila! no more stinky washer. And finally - It's so stinkin' cheap compared to purchasing fabric softener. For my family, it's an added bonus because I hadn't been able to use fabric softener at all since we have such sensitive skin.
Now, I know what you are thinking... Are my clothes going to smell like vinegar? No! Not in the slightest. This may be the thing that surprised me the most, but, it's true. I can smell it a little in the washer because there's a little bit in the fabric softener compartment, but the clothing just smells fresh and clean, no vinegar odor at all.
I'm now using vinegar to help clean my toilets, as a fabric softener, and as a rinse-aid in my dishwasher instead of an expensive store-bought rinse aid. I've gone from having a teeny bottle of the stuff tucked back in the pantry somewhere to buying this industrial sized bottle to use all around the house! Love it! Thanks, readers, for turning me on to this great idea.
Monday, June 7, 2010
We're Jammin'

On Friday I took Mia and baby Hyrum with me to a local berry farm. She sells strawberries for $1.25 a pound if you pick them yourself. We went out at 8am before it was hot and I sat the baby on a blanket with a few things to play with. Mia got down and helped me pick. It was really peaceful and nice to be down in the dirt working with her while she had my undivided attention to chatter about whatever she wanted. She would pick for awhile, eat for awhile, and then frolic for awhile. I picked for about 3 hours and got 5 1/2 flats - about 15 pounds - of berries.
Typically you pick strawberries around the middle of May through the end of May. I didn't realize that but, lucky for me, the season was a bit late this year. She only had small and medium berries left but that didn't matter for making jam. The variety she had me pick are extremely sweet with a very thin skin. The jam turned out fabulously.
I also stepped a bit outside my comfort zone and asked her over the phone if she would be interested in bartering my bread for berries. At first she replied, "Oh no, I don't want to do that." I said that it was ok, I still wanted to pick from her. While I was there she came up to me several times asking more questions about the bread. When I left I signed up to come back for blueberries and blackberries and she said, "Write down "bread" by your name and bring a loaf or two when you come back and we'll work something out. I'd like to try that." So, you never know.
One thing I've found with the jam is that it took me a full day of work but I stocked my pantry with about 25 jars of jam and still have some berries in the freezer. At Christmas time last year I used old baskets I had in the attic, spruced them up with some ribbon and filled them with a few jars of my homemade jams. I added some fresh pecans from a friend's yard and people were absolutely delighted to receive them. It allowed us to give gifts to people like Bruce's piano teacher and my husband's bosses, plus additional gifts to family members without spending anything over the holiday months. Everyone enjoyed it so much I plan on doing it again, I've even been recollecting baskets and jars from some people with a promise to refill them. It's a win-win!
And, I won't have to buy jam for another year. I don't feel so bad about giving my family peanut butter and jelly sandwiches for lunch a couple times a week (which cuts the grocery budget) when it's made with homemade whole wheat bread and homemade jam!
Monday, May 31, 2010
The Budget
I realise it may look like I've abandoned my New Year's Resolution - but this is not the case! We've been focusing on one big thing lately, the budget. When you think about it, living providently boils down to one major item and that's it, isn't it? At least, it is for us. Learning to live below your means is the key to provident living. I'll say it again in case you missed it the first time...
Learning to live below your means is the key to provident living!
When you live below your means you will find there is an abundance that can be used on things that are truly important to you, whether that's paying off debt or putting cash into savings or purchasing food storage or emergency preparedness items or even finally getting that long-overdue home repair project finished. You really can have what you want in life, you just have to prioritize and then work to get there. It won't happen on it's own.
I've procrastinated blogging about "The Budget" because it isn't really a very "sexy" thing to blog about, if you know what I mean. I'm not sure how many of my readers are just dying to learn how I budget. But for today, I'm going to pretend that you are.. so let's get started!
Back when Bryan got his first job out of college and we had been married about 5 years, we realized that when he got a real paycheck we were going to feel like we were rolling in the dough. Although his paycheck was meager, it would be so much more than we were used to getting and we were afraid we would begin spending frivolously and waste it away. We began with a program called "Rich on Any Income." It was a great program, but is no longer in print. Still, here's the premises.
#1. Pay your tithing first so you can have the Lord's blessings available to you when you go to meet your other financial goals.
#2. Set up an itemized monthly budget showing exactly how much money you need for various items. Now, when you're first starting this, it may take a couple of months to tweak exactly how much you need in each category. The program claims that it takes 3 months to really learn how to do this and I'd agree, so stick with it! Here are the categories Bryan and I have in our budget most months:
Tithe and Fast Offering
Mortgage Payment
Truck Payment
Insurance
Utilities (this includes everything from electric, trash and water to YMCA dues and Bruce's piano lessons)
Food (this is only money I spend at the grocery store - no fast food or eating out goes in here)
Cleaning and Laundry Supplies
Diapers and Wipes
Formula
Medical (this includes prescription medications plus money for us to pay co-pays in case we'd need to take someone to the doctor)
Gifts (in case there is a birthday we need to buy for)
Recreation (this would include ANY recreation for the family from eating out to renting a movie)
Clothing (in case one of the kids needs new shoes, or someone needs jeans, etc.)
Now, when you're setting up the exact amounts you need you'll probably find that there's not enough to go around. Well, guess what? That's why you've been running out of money all these years and having trouble making ends meet. Don't worry, it happens to the best of us. Guilt is only a short-term motivator so shake it off and let's move on. When you add up the amount you need and you find that you're out of money, go back and tweak it. Can you shave $20 off the grocery budget? You may realize that you actually can't afford things you feel aren't a big deal - like cable TV, or a cell phone. Maybe you need to get rid of the land line all together if the cell phone is cheaper. Maybe you need to cut your gym membership or... STOP EATING OUT!!! This is a big one for a lot of people. They think they can pick up a soda several times a week, or just order off the dollar menu. Well, it really adds up. We've found that it's the little things adding up over the month that do the most damage.
Be creative about figuring out how to make ends meet. This month, we wanted to install an air conditioning vent in Hyrum's room - so we only had $40 total for recreation for the whole month for the whole family. That's $40 for six people for a whole month. We only ate out one time the entire month - we chose pizza buffet - and we rented some dollar movies. That was it. That may sound like it wasn't much but we found plenty of free fun things to do as a family, AND that vent is FINALLY installed and we didn't break the budget to do it!
#3. Once you've got your budget in place the final step can be a hard one to learn. It's called self-discipline. Have you heard of it? It's a tricky little thing. We've found that the key to success is two-fold. Part one: Be on the same page as a couple. You have to do this together as a couple or it won't work. Discuss your real goals - is it a family vacation this year? Do you want to finally pay off that dreaded student loan? If your children are old enough, involve them and make it a positive thing. I explain to my kids that the budget is fun, that it's like a game and you have to work hard to make everything fit. When they asked to go see an expensive 3-D movie this month I explained to them about the budget and they weren't dissapointed at all. They said things like, "Maybe next month," or "We could even wait until it's on DVD and rent it! That would be fun, too!"
Part Two for making it a success: Meet together often to go over the budget. This is a MUST. In the beginning, you may realistically need to meet a few times a week or even every day. We write our receipts down in the checkbook and then itemize them in the budget. If I went to Wal-Mart and bought milk and diapers, I then record the diapers under the Diapers and Wipes category and then find the remaining balance in that category, then record the amount of the milk under the Food category. We've found that the longer you go between reconciling the budget, the more money you think you have left. It always seems better in your head and it's hard to face reality on paper.
For some people, they choose to use an envelope system and put cash in various envelopes. For example, if they have $100 a week for groceries, they take an envelope with $100 in it to the grocery store. When they run out of money, they're done for the week. Oh, making a menu and planning out your meals and snacks is also very important. If you're dining on the fly, you'll invariably end up spending more. Plan for some fun, new meals but also the old standbys that are cheap and nutritious.
For me, I go to Aldi first and buy what I can there. Then, I tally up the remaining balance I have to get the rest of my groceries at Wal-Mart. I keep a running tally as I shop there, placing items back on the shelf as I run out of money and choosing which things I really need and which we can do without.
If you have to go without something, you WILL find a way to make it work.
For example, if I can't afford hamburger buns for grilled burgers, I will realize that I can find a recipe and make them myself, which turns out to be a fun and delicious experience for the whole family. When I didn't have enough money left in the cleaning budget for the facial cleanser I love, I found that my Ivory soap at home worked just the same.
Basically, when it comes down to the budget, self-discipline really is key. For many people, I believe that if we can exercise self-discipline and choose to do without things that don't really matter - like treats (whatever that means to you - dining out, renting movies, drive thru, etc) - you will find that there really is an abundance there to use on what you really want. I think we often mistakenly feel we need to find a way to earn MORE money, when in reality if we can cut back, what we need is already there. I guess it just depends on how bad you want it, and how hard you're willing to work for it.
While it's not fun in the moment to choose to put something back on the shelf, or to choose to go without something you think you really want - coming in under budget and spending money on things that will lead to financial security is a FAR sweeter feeling than the rush of instant gratification. Trust me!
And one final thought: Try fasting and prayer about the budget. It really works. I really do understand that it's hard to stick with it the whole month through. Fast and pray as a couple at the first of the month and continue to pray for guidance with your expenditures through the month and you CAN do it! I promise you!
If anybody has any budget tips or tricks, please comment! Any questions?
Saturday, April 24, 2010
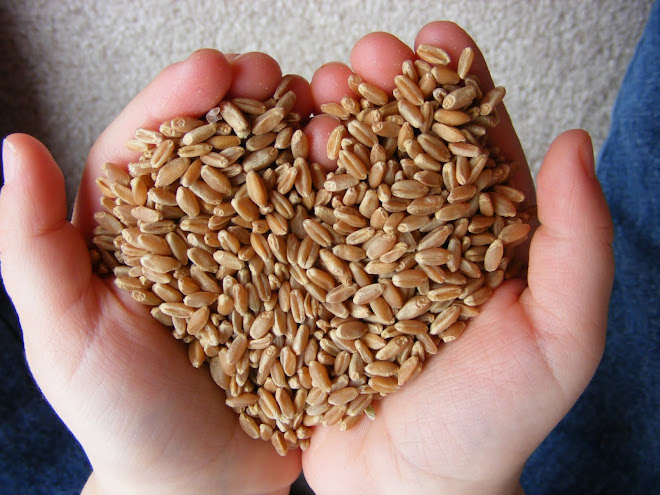
Making Your Own Bread - Lesson One, Buying the Wheat
I promised and promised and I'm finally going to make good on my word! I'm really going to blog about how to make your own bread. Let's start at the beginning - selecting and buying whole wheat.
I use a 50/50 blend of hard red wheat and hard white wheat. Why? Well.....
 Hard red wheat (called hard red winter wheat or hard red spring wheat - depends on when it's planted) is what has traditionally been used by bread makers. I love the nutty flavor and the way it gives a little crunch and texture to the bread.
So, why add in the white wheat? Hard white wheat, while nutritionally equivalent to hard red wheat, bakes up a little lighter and fluffier (similar to white flour) and is also a little bit gentler on the digestive tract even though it is just as high in fiber. I found this great link to read more about white wheat. I have made bread with 100% hard white wheat but I just prefer the 50/50 blend. I originally started mixing it to help my kids get onto the hard red wheat without being too hard on their little tummies and we liked it so much we never went back to using just the red. You can experiment if you have access to both and see what you like.
Where can you buy wheat? If you are Mormon, you can buy from your closest cannery. Our church buys up wheat in large supply and sells it to us at a very cheap price to encourage us to gather a food storage for our families. If you are just starting out, you may ask a Mormon friend if you can buy a can of each type of wheat from them. It's very cheap and would be a great way for you to start out without spending a lot of money.
You can also click here and order directly from the church. I believe that shipping is free but they only sell a couple of long-term supply items (hard red winter wheat and rice, I think).
Other places to order in bulk include Walton Feed and also Emergency Essentials.
Recently, I also remember seeing large bags of whole wheat at Wal-Mart in the baking isle under the flour. You could probably check with your local grocery store and they may be willing to order some in for you. I've found that small grocers are often willing to "go the extra mile" for their customers.
I'm sure there are various other places to buy if you do a search online. I like to use Nextag.com to find the best rates on the same item at various sites. I will be posting a recipe eventually as I do a series of blogs on "Making Your Own Bread" and if you only have access to one type of wheat, you can certainly use it instead of a blend.
Sunday, April 18, 2010
One Step Closer
 We're one step closer to having a pantry full of homemade canned items that we grew ourselves. We finally got Bryan's father's tiller up and running and Bryan tilled up twice the garden we typically have. We're ready to work this year. We're really going to try to keep that attitude, even in July when there's weeding to be done early in the morning. And watering. And more weeding. ;) Wish us luck!
Saturday, March 27, 2010
Homemade Toilet Bowl Cleaner

I found this recipe online and I love it. To clean your toilet bowl, pour in 1/4 cup of baking soda and then drizzle vinegar on top. Let it sit for 30 minutes and then clean with a toilet brush.
For stains in the bowl, add about 3 or 4 Tbsp. of Borax just before you use the toilet brush. My upstairs toilet gets stains because it's the "kid's bathroom" and they tend not to flush as often as they should. I felt like the stains came right off into the water when I added the Borax.
The other reason I love this recipe (yes, it's environmentally friendly but that's not it) is because my kids feel like they're doing some sort of fun science experiment watching the water bubble and foam when they add the vinegar and then again when they add the Borax. They think it's awesome and it helps make cleaning fun!
Let me know if you try it and like it.
Monday, March 1, 2010
Homemade Dishwasher Detergent
I read a recipe recently for homemade dishwasher detergent. You mix equal parts Borax and Arm and Hammer Washing Soda. You add 2 Tbsp of this mixture to your dishwasher.
Vinegar can be put in the rinse-aid compartment instead of a store bought rinse-aid like Jet Dry.
I read another recipe that said you could use equal parts Borax, Washing Soda and water to make a liquid detergent for your dishwasher.
The verdict: I made the powdered option this week when we ran out of dishwasher detergent and I didn't want to go to the store to buy more. I also put the vinegar in as a rinse-aid. I felt the vinegar worked well but the detergent was just so-so. My dishes really weren't as clean as usual.
The good thing, however, is that if I ever run out again and don't want to go to the store to buy more, or it's the end of the monthly budget and I don't want to spend on more - I have another option. I do have the ingredients on hand to make this (they are the same ingredients that went into the homemade laundry soap). I should also mention that my dishwasher is really, really old. I have a friend who tried the homemade liquid variety in her 4 month old dishwasher and loved it. So, that could be what I'm lacking. You can also add a drop of lemon or orange essential oil to add a fresh scent.
I'm curious to hear if anyone else tries this and likes it.
Wednesday, February 24, 2010
Prepping the Garden

It's time to prep the garden. We were talking about fertilizer this year and I didn't want to use a store-bought, man-made fertilizer. I wanted something natural. You know what that means... manure. We don't have any livestock but we do know someone who lives nearby that owns a lot of alpacas. I asked her and she not only invited us to come help ourselves to her compost pile, she even showed Bryan how to use the loader on her tractor to load his truck with it! Isn't that nice? Alpaca manure is wonderful for the garden because it's already in dry pellets so it's not as messy as some manure. Plus, it works better than Miracle-Gro. Once it has been composted, the heat in the compost pile helps kill grass seed or other weed seeds that may be in it.
You may be asking yourself, "Is she saying she's excited about free poop?" Yes. That is exactly what I'm saying.
Saturday, February 20, 2010
Post Script
There was something I forgot to mention in my last post. I realized something unexpected once we started the bartering process - both parties involved seem to think they have the better end of the bargain. How fun is that? I'm elated to have the fresh eggs and she and her family are thrilled with the bread. I don't know why but for some reason I had the word "barter" synonymous with "compromise," thinking that both parties would be giving up something. But that's not how it is at all. Quite the opposite, it's great for everyone, no sacrificing involved. She had extra eggs, I can make bread, we both get exactly what we want. It's simple and wonderful.
Thursday, February 18, 2010
Our First Barter

I'm so excited, we've reached one of our goals! I found out about a childhood friend who has fresh eggs. She was happy to barter for my homemade bread. I brought home 2 1/2 dozen eggs for two loaves of my homemade whole wheat bread - we quickly ate scrambled eggs after bringing them home, so some are missing for the picture. I grind the wheat myself so the bread was just as fresh.
 I look forward to getting some more photos of her chickens this spring when they get to be outside all day. She has a great variety - everything from Plymouth Rocks to Bantams to Guineas.
 She also has goats and milks them twice a day. They do not buy milk or butter - they use the goat's milk. She said she's even made ice cream with it and is going to try to make cheese.
The eggs are delicious. The yolks are a deep golden color which means they have tons of vitamins in them. The shells are nice and thick. It's so obvious how much healthier they are than store-bought eggs. Plus, I'm no longer paying for eggs! Soon, I will blog about how to make your own bread.
We've successfully cut our three most frequent store-bought items from the budget. Milk, bread and eggs. The milk budget has been cut in half now that I'm supplementing with our non-fat dry milk from food storage, I'm making 100% of our bread from food storage items and no longer buying it, and we're bartering for fresh eggs and no longer buying them. These three items were what we would most frequently "run to the store" for and end up picking up other items while we were there. So excited!
Mary said something that really resonated with me when I was picking up the eggs. She said, "Once you get used to doing things yourself, it's actually easier." I think she's right. It really is easier for me to make a couple of loaves of bread while I'm cooking dinner or homeschooling than it is for me to run to the store and get more. It's also SO much healthier. Can't wait to share more...
Monday, February 8, 2010
Milk
 This gallon of milk cost me $3.58. It goes fast in my house.We usually all have a glass at dinner plus some on the oatmeal in the morning. The baby is too little to have it - but still, the other five of us drink it. I'd say we go through 3 gallons a week, sometimes more if I'm doing a lot of baking. Want to know how to stretch it?
 In an effort to decrease our food expenses I'm trying to be more disciplined about using my food storage. I used to do this but had gotten away from it. We have non-fat dry milk. It's not quite the same as instant milk. This tastes better but you have to blend it a little more. (If I remember correctly, instant milk looks like little dry pearls and melts instantly in water. It also has a very distinct odor). The non-fat dry milk especially tastes good if you mix it with your regular milk!
So, here's what I do. When my store-bought milk is down to half a gallon, I mix up some of my non-fat dry milk. The dry milk I have mixes 3/4 cup of dry milk with 4 cups of warm water. I mix mine in the blender but I'm sure you could mix it by hand or give it a good shake if you had a pitcher with a tight fitting lid. Then I place my mixed milk in the fridge until it's good and cold and I pour it into the store-bought milk, refilling it up to a full gallon.
Important things to remember:
*Check the expiration date on your half gallon of store-bought milk before adding in dry milk. If you still have enough time to finish all of it before it expires, you're good. If it expires in a day or two, you may want to wait until next time to try this.
*Only refill a jug ONE time. I only refill my jug once, then we use it until it's empty and move on to a new jug of milk. If you keep refilling the same jug you are going to keep mixing new milk and old milk and could end up making yourself sick.
*I add a little vanilla to the blender when I'm making my non-fat dry milk. It helps out the flavor a little. Maybe 1/2 tsp - 1 tsp? Tonight at dinner I served a jug of half store-bought and half non-fat dry milk and everyone had seconds. I could taste a little of the vanilla and the milk tasted slightly different than usual but it was good. Not gross at all.
*When you get your mixed milk out of the fridge, sometimes there will be foam on the top. I just scoop this off with a large spoon and put it down the drain before I pour it into the jug.
Let me know if you try it. This saves us quite a bit of money. And, it's good for us to be circulating our food storage and keeping it fresh. My non-fat dry milk was purchased at a food storage cannery for our church. If you have a Mormon friend and you want to give this a try - ask them, they may be able to hook you up with a sample. :) But, I'm sure you can buy this type of dry milk in the store, just probably not quite as cheap as I get it at the cannery. I promise, sometime I'll blog about food storage.
Wednesday, January 27, 2010
Our Goals
Here are the goals we have so far. They may sound really lofty but we have the whole year to progressively work toward them.
1) Start making all of our own bread again.
2) Grow our garden again this year but learn to can at least two vegetables out of it.
3) Decrease our average water usage by 5%.
4) Barter at least one time this year (I'm sort of thinking of trying to barter homemade bread for farm fresh eggs from someone).
5) Do two humanitarian aid projects this year with the children.
6) Double the amount we are paying monthly to local humanitarian aid by the end of the year.
7) Switch from non-durable goods to durable ones (as many as I can). For example - stop buying paper napkins and make some out of used fabric.
8) Learn to make more of our cleaning supplies.
9) We want to cut the grocery budget but we haven't yet come up with a $ amount. May have to get back to you on that one.
10) This one is sort of a repeat - but in general, we want to learn to make a lot more of what we are currently buying at the store. For example, salsa, spaghetti sauce, bread, tortillas, cleaners, etc.
11) Bryan is considering taking on some mowing jobs this mowing season and we would use all of the money he earned to pay off the truck (that's our only debt besides the house).
12) I am considering selling my homemade bread one day a week over the summer and using the money to purchase a deep freezer for us and stock it.
So, those are things we've come up with that we want to work on. We tried to make the goals as specific as we can but some are still a little open-ended. We really think if we just keep working a little at a time we can make a huge difference over a year's time. Wish us luck! The journey should be interesting!
Wednesday, January 20, 2010
I Promise!
I promise to blog again as soon as I can. I've been sick for about 5 weeks now - with one thing after another. I'm on antibiotic again and today I'm feeling a little better for the first time in SO long. So, hopefully, I'll get a little caught up around here and be able to continue the new blog. Stay tuned....
Thursday, January 7, 2010
Making Your Own Laundry Soap
We've not yet gotten all of our concrete goals in place so I thought I'd go ahead and show you how to make your own laundry soap.
You are also going to need a 5 gallon bucket with a lid (we purchased ours from a local farm supply store) and a container for daily use of your laundry soap (I used an old liquid laundry container).


1. First, grate the bar of Ivory soap. This may sound labor intensive, but it's not that bad. It only takes a couple of minutes. Add the grated soap to a saucepan of 4 Cups hot tap water. Stir continually over medium heat until completely melted and dissolved.
As I mentioned before, I got to attend a class recently taught by a woman who lives in our area. She has been making her own laundry soap since this summer and she showed us how. I was extremely skeptical. I figured it would be lumpy or wouldn't clean as well. I thought it might fade out our clothes or be hard to make, etc. Nope. I love it. It works great! I've been using it for a couple of months now. The cost? It figures out to around 78 cents for ten gallons. Can't beat that. It's practically free.
The ingredients:
1 bar Ivory soap (If you are allergic to Ivory - try this recipe)
1 Cup Arm and Hammer Washing Soda (this may be hard to find. Call 800-524-1328, 9-5 ET to find a local relailer)
1/2 Cup Borax
You are also going to need a 5 gallon bucket with a lid (we purchased ours from a local farm supply store) and a container for daily use of your laundry soap (I used an old liquid laundry container).
1. First, grate the bar of Ivory soap. This may sound labor intensive, but it's not that bad. It only takes a couple of minutes. Add the grated soap to a saucepan of 4 Cups hot tap water. Stir continually over medium heat until completely melted and dissolved.
2. Next, fill your 5 gallon bucket 1/2 full with hot tap water. Add the melted soap, washing soda and Borax and stir until the powder is well dissolved.

3. Fill the bucket to the top with more tap water. Stir, cover and let stand overnight to thicken.
4. The next day your laundry soap is going to have thickened quite a bit. It may remind you of Jell-O. It's hard to stir at first but you want to mix it all together thoroughly. If you want to scent your laundry soap you may now add 10 - 15 drops of essential oil.

5. Now it's time to fill your clean laundry soap dispenser. Measure out a cup at a time and fill half of your laundry soap dispenser. Fill the other half (and you know exactly how much water to add because you measured how much soap you put in) with water.
6. SHAKE WELL BEFORE EACH USE. For this reason, I chose to use a smaller laundry soap dispenser. Use 5/8 Cup for regular washing machines and 1/4 Cup for HE machines (This is after it's been mixed with water in your daily laundry soap dispenser).

Don't forget to stir your soap in the big bucket before each time you fill your laundry soap dispenser. It will always appear clumpy in the bucket, but when you put it in your dispenser and shake it, it gets rid of the clumps. Like I said, my clothes are clean and smell fresh. I couldn't be happier! You will notice that you go through your daily dispenser a lot quicker than if it were store bought - because you are using more - but it's still SO much cheaper. And you have that HUGE bucket when mixed with water will make 10 gallons, so no worries!
I'm curious to hear if any of you try it and what you think! Best of luck!
Friday, January 1, 2010
Our Resolution
I've never been one for New Year's Resolutions. This year there's been something nagging on my mind for months.
Every time I leave Wal-Mart I have this sick feeling in the pit of my stomach as I load all of those bags into my van. I hate the feeling of, "Oh, we ran out, we need to go to the store to get more." It has to do with a few things. First, I don't like the idea of being dependent upon a store for our basic life necessities. Secondly, I don't like how much our family is consuming. For me, this has nothing to do with leaving a smaller carbon footprint, not that that's wrong - it's just not my motivation. I just feel that as our family grows we are consuming a mind-boggling amount of stuff. And I consider myself a frugal shopper. Besides making our budget feel strapped, I just wonder what would happen if we switched to just consuming what we needed and not a lot more. And, thirdly, the idea of "running to the store to get more" just feels lazy and uncreative. Not sure if that one makes sense to everyone - but I feel the security we'd gain with a little hard work would be well worth the effort.
My hope is that by consuming less we can become more free. More free in a few ways. We would become less reliant upon unreliable resources (like the store) through learning to make more of what we use ourselves. We would free up more of our income to use on long-term storage and emergency preparedness. We would also have more income free to do more humanitarian aid work, a value I want to cement into the core of my children's beings. Many of you know our church is big on self-reliance, food storage, etc. The idea behind it is that if you have taken care of your own needs, you are then free to help meet the needs of others who can't do for themselves. Makes sense, huh?
My mother said during the last election that our country is losing the meaning of freedom. She explained to me that to be free means that we can choose what we want, and we can work for it ourselves. Therefore, it becomes ours and ours alone. We are not beholden to anyone. I believe this to be true.
What inspired me to do this? Besides the sick feeling I get carrying all those plastic sacks of Wal-stuff into my house every week, I had the experience recently of learning to make my own laundry soap. I went to a class about it taught by a woman in our community who'd learned how. I was skeptical that it wouldn't work as well as the All Free Clear that I spend over $10 a month on every month. The homemade laundry soap was liquid and had three ingredients besides water. The cost? About 78 cents for ten gallons. Yep. Surely it wouldn't work as well, or it would be clumpy, or fade out my clothes. Nope. Couldn't be more thrilled with it!! I've been using it for two months now. It's so easy. After we post our concrete goals for the year it'll be my first post.
What will I be posting on this blog? First of all, I don't intend for this to be a really wordy blog like this post. I plan on posting our concrete goals next. We will work on those as a family. I want goals related to resource usage (water, electricity, etc.), lowering food costs, planting a garden and learning how to can several items I buy almost weekly at the store, increasing the amount of hands-on humanitarian aid work we do, and learning how to make more of what we use ourselves. I also hope to learn to barter, a technique my friend Jolin is fabulous at, and I want to store up more necessities for future needs. Those are just a few examples. After we come up with our goals, I plan on posting our progress one step at a time. If we learn how to can something, I'll blog about it. If we make our own soap, I'll blog about that. So, I plan on lots of pictures and information to share with others who might want to try something new, too. I also can't wait to hear other's suggestions as we go through this year.
Am I nervous? Definitely. To me, this has felt like something we've needed to work on for a long time but it felt too big to really tackle. We are, however, doing this as a family. I've found that children often have the most practical solutions. Mostly, I can't wait to get started.
So, I can't wait to hear what everyone thinks! Let's see what happens....
Subscribe to:
Posts
(
Atom
)